
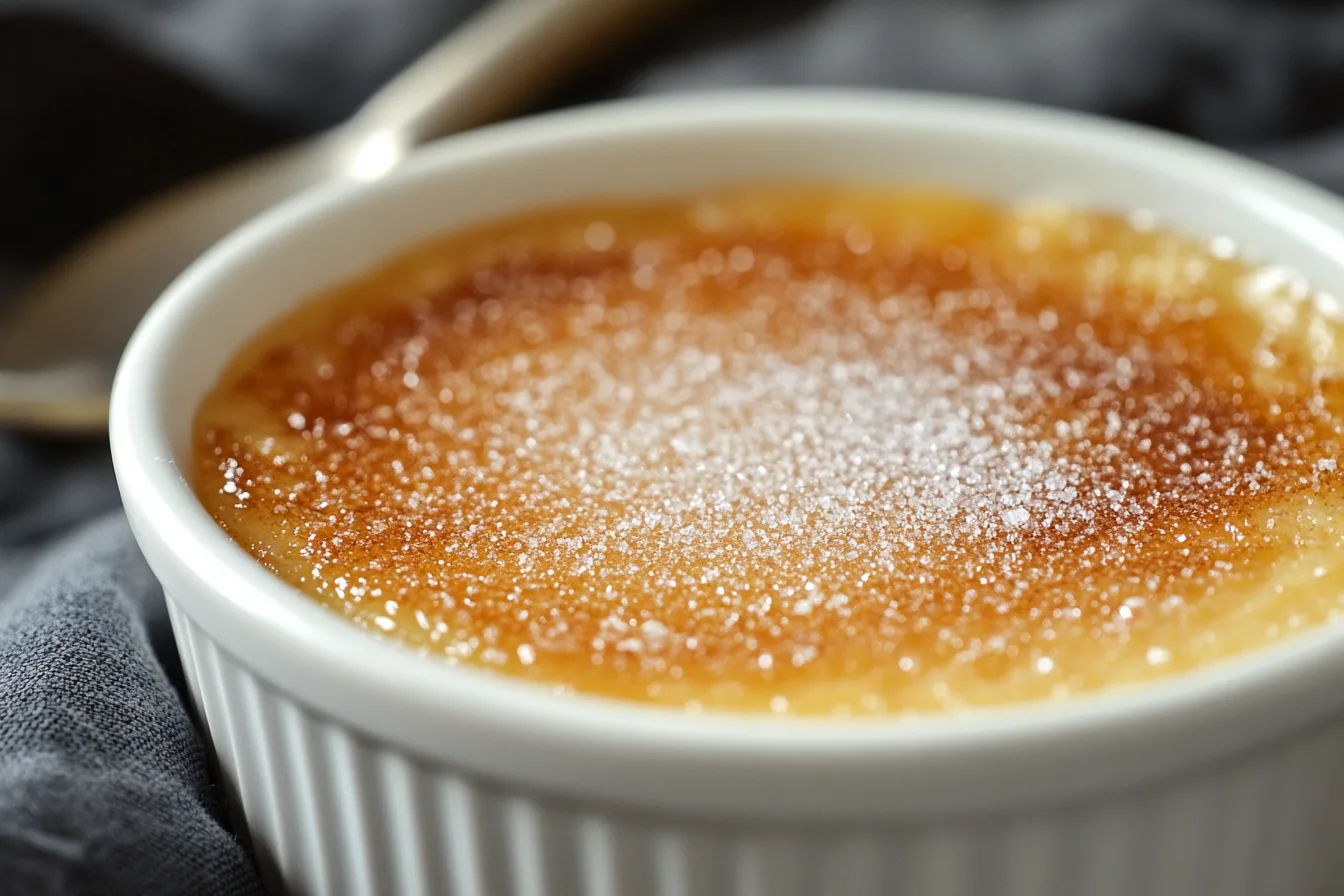
Crème brûlée is one of those desserts that feels like pure magic. You crack through its caramelized sugar crust and dive into the creamy, velvety custard underneath. But if you’ve ever wondered, “How far in advance can I caramelize crème brûlée?” you’re not alone. Timing is everything when it comes to keeping that sugar crust perfectly crisp and satisfying. Let’s dive into the secrets of mastering this iconic dessert! 🍮✨
Introduction to Caramelizing Crème Brûlée
What is Crème Brûlée and Why is Timing Important?
Crème brûlée, which literally means “burnt cream” in French, is all about textures. The creamy custard contrasts beautifully with the crispy sugar top. But here’s the catch—if you caramelize that sugar layer too early, you risk losing its crunch, turning it into a sticky mess. Not exactly the elegant dessert you were hoping for, right?
The Role of Caramelization in Crème Brûlée’s Texture and Taste
Caramelization is where the magic happens. When you sprinkle sugar on top of the custard and heat it until it melts and browns, it transforms into a crisp, flavorful crust. This layer not only adds sweetness but also provides that satisfying crunch that balances the smooth custard beneath. Timing your caramelization is key to preserving this perfect contrast.
“The perfect crème brûlée is all about balance—creamy custard, crispy sugar, and just the right timing.”
Understanding the Science Behind Caramelization
How Sugar Transforms During Caramelization
Let’s get a little nerdy for a second. When you heat sugar, it undergoes a process called caramelization. This happens at around 320°F (160°C), where sugar molecules break down and reform into flavorful compounds. The result? A rich, nutty, slightly smoky flavor that makes crème brûlée irresistible. But here’s the catch: caramelized sugar attracts moisture. If left for too long, it absorbs humidity from the air, softening that crisp crust.
Now, you might wonder, how far in advance can I caramelize crème brûlée? The answer lies in understanding how moisture impacts caramelized sugar. If you caramelize too early, the sugar crust loses its crunch, which defeats the purpose of this dessert’s iconic crack.
Why Timing Affects the Crispness of the Sugar Layer
Caramelized sugar is like a sponge—it loves moisture. This is why timing is so important when deciding how far in advance can I caramelize crème brûlée. Caramelize the sugar layer too early, and it will absorb moisture from the custard or the surrounding air, turning your crisp top into a sticky mess. That’s why most chefs recommend caramelizing crème brûlée just before serving.
To ensure you’re serving crème brûlée at its best, knowing how far in advance can I caramelize crème brûlée becomes crucial. If you’re hosting a dinner party, it’s better to torch the sugar just minutes before serving to maintain the perfect balance of texture and flavor.
Can I Prepare Crème Brûlée in Advance?
The good news? Yes, you can prepare the custard in advance. In fact, crème brûlée is one of those desserts that’s perfect for planning ahead. You can make the custard base, bake it, and chill it in the fridge for up to 3 days. But—and this is a big but—you should only caramelize the sugar just before serving to keep that crispness intact. So, if you’ve been asking yourself, how far in advance can I caramelize crème brûlée, the answer is: not too far ahead!
How Long Can the Sugar Stay Crisp After Caramelizing?
Here’s the short answer: not long. Once you caramelize the sugar, it usually stays crisp for about 20–30 minutes under normal conditions. If you’re wondering, how far in advance can I caramelize crème brûlée for a dinner party? plan to torch the sugar no more than 10 minutes before serving for the best results. This will ensure your guests get to enjoy the signature crack and creamy custard without any disappointment.
What Happens if You Caramelize Too Early?
Let’s say you caramelized your crème brûlée an hour before serving. What happens? The sugar layer might start to soften and become sticky, ruining that iconic crack. Worse, it could even melt completely into the custard, leaving you with a sugary syrup on top instead of a crunchy crust.
This is why understanding how far in advance can I caramelize crème brûlée is so important. Timing is everything. If you caramelize too early, you risk losing the crispness and elegance that make this dessert so special.
Best Practices for Caramelizing Crème Brûlée in Advance
The Ideal Time to Torch the Sugar Layer
Timing is everything. The sweet spot for caramelizing crème brûlée is about 5–10 minutes before serving. This ensures the sugar crust remains crisp and satisfying while the custard stays cool and creamy underneath.
Tools and Techniques for Perfect Caramelization
When it comes to caramelizing crème brûlée, a kitchen torch is your best friend. It gives you precise control over the heat, allowing you to evenly caramelize the sugar without heating the custard. If you don’t have a torch, you can use an oven broiler—but be careful! The sugar can burn quickly, so keep a close eye on it.
How to Store Caramelized Crème Brûlée Without Losing Crispness
Unfortunately, storing caramelized crème brûlée isn’t ideal. If you absolutely must caramelize in advance, try covering the desserts loosely with a dry, breathable material like parchment paper to minimize exposure to moisture. But even with this trick, the crispness won’t last long.
Nutrition Facts: Crème Brûlée (Per Serving)
| Component | Value |
|---|---|
| Calories | 250 |
| Fat | 18g |
| Sugar | 20g |
| Protein | 4g |
Ingredients (For 6 Servings)
| Ingredient | Quantity |
|---|---|
| Heavy Cream | 2 cups |
| Vanilla Bean | 1 pod |
| Egg Yolks | 5 |
| Sugar | 1/2 cup |
| Extra Sugar (for Caramelizing) | 6 tablespoons |
Stay tuned for the next part, where we’ll dive into the common problems, solutions, and expert tips to take your crème brûlée game to the next level!
The Most Common Problems When Caramelizing Crème Brûlée
Sugar Melting Too Quickly After Caramelization
One of the most frustrating issues when caramelizing crème brûlée is seeing your perfect sugar crust turn into a sticky mess within minutes. Why does this happen? The sugar absorbs moisture from the custard and the surrounding air. Humidity plays a big role here—on particularly humid days, your caramelized sugar may start softening much faster than usual.
“Humidity is the enemy of caramelized sugar. The crisp crust can turn sticky in no time.”
Uneven Caramelization: Causes and Fixes
Ever notice some parts of your sugar layer are perfectly golden while others are burnt? Uneven caramelization often happens when the sugar isn’t spread evenly or when your torching technique is off. Here’s a tip: hold your kitchen torch a few inches away and move it in a circular motion to heat the sugar evenly. Patience is key—don’t rush!
Over-Burning the Sugar Layer
Burnt sugar may sound fancy, but it’s not what you want on your crème brûlée. If you hold the torch too close or leave the sugar under the broiler for too long, it can burn quickly, leaving a bitter, unpleasant taste. The fix? Use a steady hand and watch closely. Sugar caramelizes fast—once it turns golden, stop immediately.
Solutions to Extend the Life of Caramelized Crème Brûlée
Using Stabilizers to Prolong Crispness
Here’s a pro tip: adding a stabilizer like powdered gelatin to your custard can help reduce moisture transfer to the sugar layer. While this won’t make your caramelized sugar last forever, it can buy you some extra time, especially if you need to prepare desserts slightly in advance.
Temperature Control Tips for Perfect Caramelization
Temperature matters—a lot! Make sure your custard is chilled before you caramelize the sugar. Warm custard releases more moisture, which can soften the sugar layer faster. A cold custard base provides a better foundation for a long-lasting crunch.
Storing Pre-Caramelized Crème Brûlée for Short Periods
If you absolutely must caramelize your crème brûlée in advance, store it in a cool, dry place. Avoid covering it with plastic wrap, as this traps moisture. Instead, use parchment paper or leave it uncovered in a low-humidity environment. This isn’t ideal, but it’s a workaround for short-term storage.
Expert Tips for Caramelizing Crème Brûlée Like a Pro
Choosing the Right Sugar for Caramelization
Not all sugars are created equal. For crème brûlée, superfine sugar works best. It melts evenly and caramelizes quickly, giving you a smooth, crisp crust. Avoid brown sugar—it tends to burn faster and doesn’t provide the same satisfying crack.
Timing Techniques for Hosting and Large Events
Hosting a dinner party? You don’t want to be torching crème brûlée while guests are waiting. Here’s a trick: prepare the custards and torch the sugar layer just 5–10 minutes before serving. If you have several desserts to caramelize, work in small batches to maintain quality.
How Professional Chefs Handle Advance Caramelization
Ever wonder how restaurants manage to serve crème brûlée with a perfectly crisp crust every time? Many chefs use dehumidifiers in their kitchens to control moisture levels. Some also caramelize the sugar slightly thicker than usual, which helps the crust last longer without softening.
Alternatives to Traditional Caramelization Methods
Using an Oven Broiler Instead of a Torch
No kitchen torch? No problem! An oven broiler can do the trick. Sprinkle the sugar evenly over the custard and place it under the broiler on high heat. The key is to keep a close eye on it—sugar can go from golden to burnt in seconds. Rotate the ramekins if needed for even browning.
Experimenting with Flavored Sugars
Want to take your crème brûlée to the next level? Try using flavored sugars. Infuse your sugar with vanilla, citrus zest, or even a hint of cinnamon before caramelizing. This adds a unique twist to the classic dessert and will have your guests asking for your secret recipe!
Can You Freeze Caramelized Crème Brûlée?
Freezing crème brûlée is tricky, especially if the sugar is already caramelized. The freezing process introduces moisture, which will ruin the crisp crust. If you must freeze it, do so before caramelizing the sugar, and torch the top after thawing. It’s not ideal, but it works in a pinch.
Quick Reference Table: Common Problems and Solutions
| Problem | Solution |
|---|---|
| Softened sugar crust | Caramelize just before serving; store in a low-humidity environment. |
| Uneven caramelization | Spread sugar evenly; use a steady circular motion with the torch. |
| Burnt sugar | Keep the torch a few inches away and watch closely. |
| Sugar won’t caramelize | Ensure the sugar layer is thin and evenly spread. |
Creative Twists on Caramelization
Infusing the Sugar with Unique Flavors
Caramelizing crème brûlée doesn’t have to be limited to plain sugar. Why not give it a creative twist? Infusing your sugar with flavors like lavender, cardamom, or even espresso can elevate your dessert to a whole new level. To do this, simply mix the flavoring ingredient with sugar and let it sit for a day or two before straining. This subtly flavored sugar adds an unexpected and delightful dimension to your crème brûlée.
Layering Flavors with Toppings
If you’re feeling adventurous, try layering your caramelized sugar with additional toppings. A sprinkle of sea salt over the caramelized crust can create a stunning contrast of sweet and salty. Alternatively, you could drizzle a thin layer of melted chocolate on top after caramelization for a decadent touch. Remember, these additions should enhance the dessert, not overpower it.
Experimenting with Textures
For those who love experimenting with textures, consider incorporating a crunchy nut topping. After caramelizing the sugar, lightly sprinkle crushed pistachios, toasted hazelnuts, or almonds on top. This adds a delightful crunch and a nutty aroma that complements the creamy custard beautifully.
Flaming the Crust for Drama
Want to impress your dinner guests? Take inspiration from flambé desserts and use a splash of high-proof alcohol like rum or brandy on the sugar layer before caramelizing. Light it up carefully (always prioritize safety!) and let the flames burn off to reveal a beautifully caramelized crust. This adds a subtle depth of flavor and a memorable presentation.
Conclusion: The Perfect Timing for Crème Brûlée Caramelization
Balancing Convenience with Quality
At the heart of every great crème brûlée is balance—the balance between creamy custard and crispy sugar, and the balance between convenience and quality. While it’s tempting to caramelize in advance, the best results come from torching the sugar layer as close to serving time as possible. If timing is a challenge, remember the tips we’ve covered to maintain the integrity of your dessert.
Final Tips for Caramelizing Crème Brûlée at Home
- Always chill your custard thoroughly before caramelizing the sugar.
- Use superfine sugar for an even, smooth crust that caramelizes quickly.
- Hold your torch a few inches away and move it in a steady circular motion for even caramelization.
- Keep an eye on the sugar as it caramelizes—stop the moment it turns golden brown.
- Experiment with flavors and toppings to create a unique twist on the classic dessert.
FAQs About Caramelizing Crème Brûlée
Can I Use a Torch Lighter Instead of a Kitchen Torch?
Technically, yes, but it’s not ideal. A torch lighter may not provide even heat or sufficient intensity to caramelize the sugar effectively. Investing in a proper kitchen torch is worth it if you’re serious about crème brûlée.
What Should I Do If My Sugar Layer Turns Sticky?
If your caramelized sugar turns sticky, it’s likely due to high humidity or improper storage. Next time, try caramelizing closer to serving time and store the dessert in a low-humidity environment.
How Do I Avoid Burning the Sugar?
The key to avoiding burnt sugar is patience and precision. Hold the torch a few inches away, move it evenly over the surface, and stop as soon as the sugar turns golden brown. It’s better to under-caramelize slightly than to overdo it.
Can I Make Crème Brûlée Without a Torch?
Absolutely! You can use an oven broiler to caramelize the sugar. Just keep the ramekins close to the broiler and watch carefully to prevent burning. Rotate the ramekins as needed for even browning.
Final Words: Mastering the Art of Crème Brûlée
Caramelizing crème brûlée is an art, and like any art, it takes practice and patience. Whether you’re preparing it for a special occasion or just treating yourself to something indulgent, remember that the perfect crème brûlée is about more than just the recipe—it’s about the little details. From using high-quality ingredients to timing your caramelization perfectly, every step plays a role in creating a dessert that’s as beautiful as it is delicious.
“Crème brûlée is more than a dessert; it’s an experience—a little moment of luxury in every bite.”
So, go ahead and try these tips and tricks. Torch that sugar, crack through the crust, and savor the creamy perfection beneath. Happy caramelizing! 🍮✨