
Looking for a foolproof Wild Plum Jelly Recipe? 🍇 You’re in the right place! Wild plums have a tangy sweetness that makes them ideal for creating homemade jelly. This recipe is easy to follow and perfect for preserving the unique flavor of wild plums. Whether you’re a beginner or a pro, this guide has everything you need to make a delicious batch of wild plum jelly. Let’s dive in!
Introduction to Wild Plum Jelly
Why Wild Plum Jelly is a Must-Try Recipe
Why make wild plum jelly, you ask? It’s not just about the unique, tangy flavor—although that’s a big plus. Making jelly is also a way to preserve nature’s bounty and enjoy it year-round. Plus, there’s something incredibly satisfying about popping open a jar of homemade jelly that you made with your own two hands. 🍯
“Wild plum jelly isn’t just a recipe; it’s a connection to nature and a way to savor the seasons.”
The Unique Flavor Profile of Wild Plums
Wild plums have a distinct flavor that’s both tart and slightly sweet. They pack more personality than store-bought varieties, which makes them ideal for jelly. Imagine a burst of fruity tanginess on your morning toast—it’s like sunshine in a jar! 🌞
Ingredients for Wild Plum Jelly
Before you start, make sure you’ve gathered all your ingredients. Here’s a handy table to keep things organized:
| Ingredient | Quantity |
|---|---|
| Wild Plums | 4 pounds (about 8 cups) |
| Sugar | 7 cups |
| Pectin (powdered or liquid) | 1 box (1.75 ounces) |
| Water | 1 cup |
| Butter (optional) | 1/2 teaspoon |
🌟 Pro Tip: Wild plums vary in sweetness, so be prepared to taste and adjust sugar levels if necessary!
Tools and Equipment Needed
Must-Have Tools for Making Wild Plum Jelly
Before you jump into the fun part, gather your tools. Here’s what you’ll need:
- A large stockpot (for boiling the plums and jelly)
- A jelly bag or cheesecloth (for straining the juice)
- Mason jars with lids and rings
- A ladle (for pouring jelly into jars)
- A canning funnel (to avoid spills)
- A jar lifter (to safely remove jars from boiling water)
Choosing the Right Canning Supplies
Canning supplies can make or break your jelly-making experience. Always use sterilized jars and ensure that your lids are new to guarantee a proper seal. Don’t skip the jar lifter—it’s a small investment that can save your hands from burns! 🔥
“Great tools make for a smoother process. Invest in good canning gear, and you’ll thank yourself later.”
Step-by-Step Guide to Making Wild Plum Jelly
Step 1: Harvesting and Preparing Wild Plums
The journey to delicious jelly starts with picking the best wild plums. If you’re foraging, look for fully ripened plums that are firm but yield slightly to the touch. Wash them thoroughly to remove dirt and debris.
Once cleaned, remove the pits. You can do this by slicing the plums in half or gently crushing them, then picking out the seeds. It’s a bit of work, but trust me, it’s worth it! 🫐
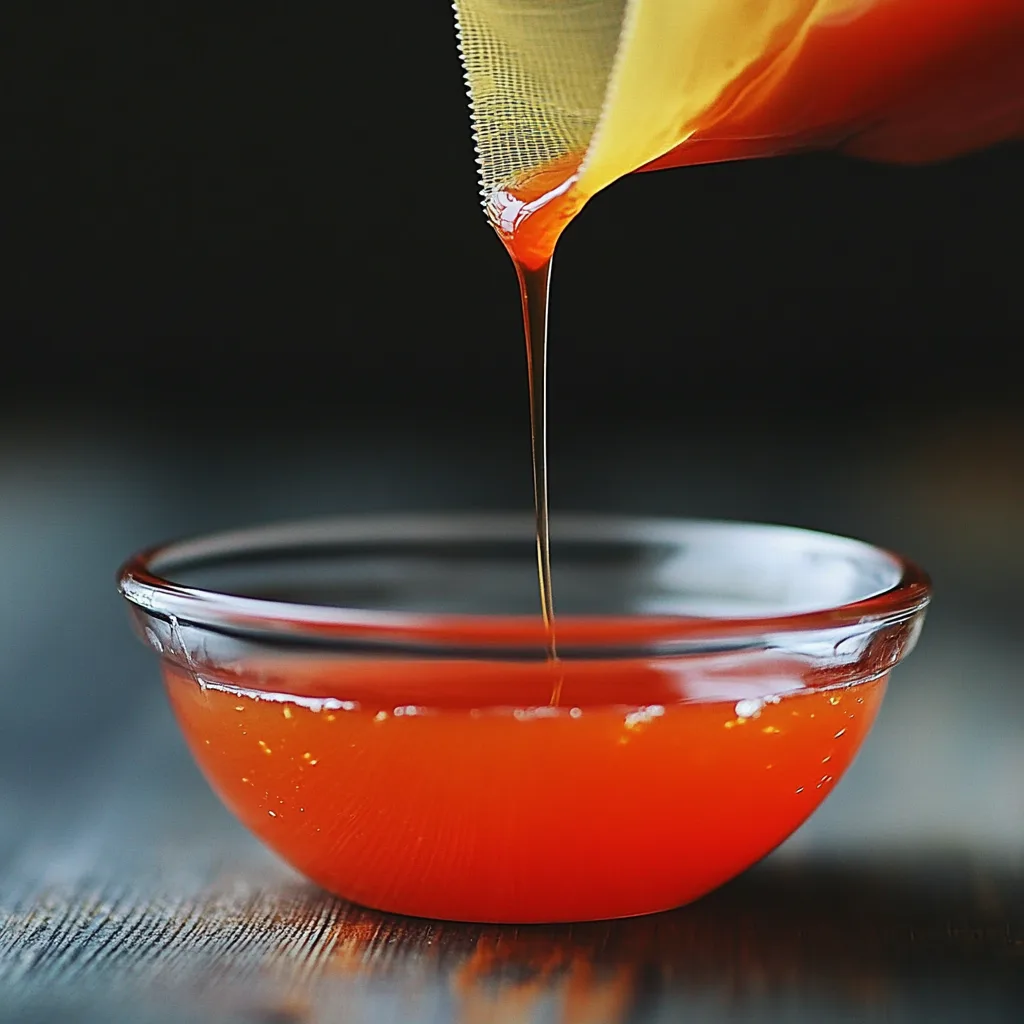
Step 2: Extracting Juice from Wild Plums
Place the plums in a large stockpot and add 1 cup of water. Bring the mixture to a boil over medium heat, then reduce the heat and let it simmer for 20–30 minutes. Use a potato masher to gently crush the plums and release their juice.
Next, pour the mixture into a jelly bag or a cheesecloth-lined strainer over a large bowl. Let it drip naturally—don’t squeeze the bag, as this can make the juice cloudy. Patience is key here! ⏳
“Clear juice makes for beautiful jelly. Let gravity do the work, and resist the urge to rush the process!”
Step 3: Cooking the Juice with Pectin
Measure the juice you’ve extracted. You’ll need about 4 cups. Pour the juice into a clean stockpot and add the pectin. Stir well to dissolve it completely, and then bring the mixture to a rolling boil.
Keep stirring to prevent scorching—it’s like babysitting, but the reward is far tastier! Add 1/2 teaspoon of butter if you’d like to reduce foaming during the cooking process.
Step 4: Adding Sugar for the Perfect Sweetness
Now that your plum juice and pectin mixture is boiling, it’s time to add the sugar. This is where the magic happens, turning tart juice into a sweet and tangy delight. Measure out 7 cups of sugar (yes, it’s a lot, but remember, jelly needs sweetness to balance the tartness of the plums!).
Gradually add the sugar to the boiling juice while stirring constantly. Once all the sugar is dissolved, bring the mixture back to a rolling boil. Boil for exactly one minute—set a timer so you don’t overdo it. Keep stirring to avoid burning. 🕒
“The perfect jelly starts with precise timing and constant attention. A minute can make all the difference!”
Step 5: Testing for Doneness
Wondering how to tell if your jelly is ready? It’s all about the consistency. Use the cold spoon test: Chill a metal spoon in the freezer for a few minutes. Dip the spoon into the jelly and let it cool for a few seconds. If the jelly forms a sheet-like droplet instead of running off the spoon, it’s ready. 🎯
If the jelly seems too runny, you may need to boil it a bit longer. But don’t overcook, as this can make the jelly too thick or even alter its flavor. Remember, patience is key, and testing is your best friend!
Step 6: Canning and Sealing Your Jelly
Once your jelly has reached the perfect consistency, it’s time to transfer it to jars. Sterilize your Mason jars by boiling them for 10 minutes. Use a canning funnel to pour the hot jelly into the jars, leaving about 1/4 inch of headspace at the top.
Wipe the rims with a clean, damp cloth to ensure a proper seal. Place the lids on top and screw the bands on just finger-tight. Then, process the jars in a boiling water bath for 10 minutes to seal them. This step ensures your jelly will stay fresh for months. 🫙✨
“Sealing your jelly is like putting a lock on treasure—it keeps all that goodness safe and sound.”
Common Problems When Making Wild Plum Jelly and Their Solutions
Why Won’t My Jelly Set? Causes and Fixes
If your jelly doesn’t set, don’t panic! This is a common issue, especially for first-timers. The most likely culprits are undercooking, not using enough pectin, or using overly ripe plums (which contain less natural pectin).
How to fix it: Pour the unset jelly back into the pot. Add 1 tablespoon of pectin for every cup of jelly, bring it to a rolling boil, and cook for another minute. Reprocess the jars, and you’re good to go! 🛠️
How to Fix Runny or Overly Thick Jelly
Runny jelly usually means it wasn’t boiled long enough, while overly thick jelly might have been overcooked. For runny jelly, follow the fix above with additional pectin. For thick jelly, you can warm it gently and add a little water to adjust the consistency.
“Jelly-making is an art and a science. Don’t be discouraged by mistakes—they’re just stepping stones to mastery.”
Dealing with Cloudy Jelly: Tips for a Clear Finish
If your jelly looks cloudy instead of crystal-clear, the problem is likely with the juice extraction process. Squeezing the jelly bag or strainer can introduce pulp, which clouds the juice.
How to prevent it: Let the juice drip naturally, even if it takes a bit longer. Use a fine mesh strainer or double-layered cheesecloth for a cleaner result. ✨
How to Prevent Crystallization in Your Jelly
Crystals in jelly are caused by undissolved sugar. This can happen if the mixture wasn’t stirred well enough during the boiling stage.
Solution: Stir constantly while adding the sugar and ensure it’s completely dissolved before boiling. If you notice crystals forming after storage, reheat the jelly and stir until they dissolve.
Tips for Making the Best Wild Plum Jelly
How to Pick and Prepare the Best Wild Plums
Not all plums are created equal! Look for wild plums that are fully ripe but still firm. Ripe plums will have the most flavor and natural sweetness, making your jelly shine. Avoid overripe or bruised fruit, as they can negatively impact the taste and consistency.
Foraged plums often come with dirt or debris, so wash them thoroughly before starting. If you’re short on time, you can freeze your plums and process them later—it’s a great way to preserve their freshness. ❄️
Balancing Sweetness and Tartness in Your Jelly
The perfect wild plum jelly strikes a balance between sweet and tart. Wild plums are naturally tangy, so sugar helps mellow out their bite. However, taste your mixture before canning to ensure it’s just right. If it’s too sweet or not sweet enough, adjust accordingly.
“A good jelly doesn’t just taste sweet—it sings with a perfect harmony of flavors.”
Storing Your Wild Plum Jelly: Best Practices
Proper storage is key to enjoying your jelly for months to come. Store sealed jars in a cool, dark place, like a pantry or cupboard. Once opened, refrigerate the jar and consume it within a month for the best flavor.
Variations of Wild Plum Jelly Recipes
Spiced Wild Plum Jelly
Looking to add a cozy twist to your jelly? Spiced wild plum jelly is the way to go! Add 1 teaspoon of cinnamon, 1/2 teaspoon of ground nutmeg, and a pinch of clove to your plum juice before boiling. These spices add a warm, aromatic flavor that’s perfect for autumn mornings or holiday gift-giving. 🍂
“Spices turn your jelly into a jar of festive joy. It’s like autumn on a slice of toast!”
Low-Sugar Wild Plum Jelly
Prefer a less sweet version? You can make a low-sugar wild plum jelly by using a special low-sugar pectin. Reduce the sugar to about 3-4 cups, depending on your taste, and follow the same steps. Keep in mind, low-sugar jelly may have a softer set but will still taste amazing! 😊
Wild Plum Jam: A Chunky Alternative
If you love a heartier texture, try making wild plum jam instead of jelly. Skip the straining step and keep the plum pulp in the mixture. Cook the plums with sugar and pectin until thickened, and you’ll have a spread bursting with fruity goodness in every bite. It’s perfect for biscuits and scones! 🥐
Frequently Asked Questions About Wild Plum Jelly
Can I Freeze Wild Plums for Later Use?
Absolutely! Freezing wild plums is a great way to preserve them until you’re ready to make jelly. Wash and pit the plums, then store them in airtight bags or containers. When you’re ready to use them, thaw and proceed with the recipe. 🧊
How Long Does Wild Plum Jelly Last?
When properly canned, wild plum jelly can last up to a year in a cool, dark place. Once opened, refrigerate it and use it within a month. If you notice mold or an off smell, discard the jelly immediately for safety. 🛑
Can I Make Wild Plum Jelly Without Pectin?
Yes, you can make jelly without pectin, but it requires a bit more effort. Wild plums contain natural pectin, so you can boil the juice with sugar for a longer time to achieve a set. However, the texture may not be as consistent as with commercial pectin.
“No pectin? No problem. Wild plums are nature’s jelly-makers!”
Conclusion: Enjoying Your Homemade Wild Plum Jelly
Congratulations! You’ve now mastered the art of making wild plum jelly. Whether you’ve followed the classic recipe or experimented with a variation, you’ve created something truly special. There’s nothing quite like enjoying the fruits of your labor (literally!) on a slice of warm toast or sharing a jar with loved ones. 🍇
Making jelly isn’t just about the end result—it’s about the process. From foraging for plums to sealing the jars, each step connects you to the food you create and the memories you’ll make along the way. So go ahead, pop open a jar, and savor the taste of nature in every spoonful. 🏞️
Looking for the ultimate Wild Plum Jelly Recipe? 🍇 You’ve come to the right place! This recipe not only captures the unique tartness of wild plums but also walks you through every step to create a perfectly balanced homemade jelly. Whether you’re a seasoned canner or a first-timer, this Wild Plum Jelly Recipe is simple, delicious, and perfect for sharing.
Ingredients for the Wild Plum Jelly Recipe
Before diving into the cooking process, make sure you have all the ingredients ready for this Wild Plum Jelly Recipe. The secret to success lies in using fresh, ripe wild plums, balanced with just the right amount of sugar and pectin for that perfect set.
Why Make a Wild Plum Jelly Recipe?
Why choose a Wild Plum Jelly Recipe? For starters, wild plums are bursting with natural flavor and make a jelly that’s both sweet and tangy. This recipe also allows you to preserve the taste of the season, creating jars of goodness to enjoy year-round. Whether it’s breakfast toast or a glaze for roasted meats, this jelly is endlessly versatile!
Storing Your Wild Plum Jelly Recipe Creations
Once your jars of jelly are sealed and cooled, you’ve successfully completed your Wild Plum Jelly Recipe. Proper storage ensures that your hard work lasts for months, so you can enjoy your jelly long after plum season is over.
“Homemade jelly is more than a recipe; it’s a tradition, a story, and a gift from the heart.”
If you enjoyed this guide, don’t forget to bookmark it for your next jelly-making adventure. Have questions or tips of your own? Share them in the comments below—we’d love to hear from you! 🌟